Showing posts with label Home Improvement. Show all posts

Saturday, February 2, 2019

Bright and Bold Playroom Makeover

I finally got the playroom/craft space done and I couldn't be more pleased with how it turned out!


We decided to turn our downstairs guest room into a play room because lets face it, kids come with a lot of "stuff" and having it all in the main living area was driving me crazy. 
I wanted to have a fun space where Norah and her brother could play and be creative. I also saved a little area in the room for my desk so I could work in there right a long side of them.


I knew I wanted a bold print on one of the walls but struggled to find wallpaper that was affordable and easy to install. I finally decided to just buy a round stencil sponge brush and do it myself. Once I got the courage to place the first dot, the rest was easy - peasy and took about an hour. I love that they aren't perfect because it makes it more whimsical.


My Mom and I made the cornice boards in about 30 minutes and the total for the project was less than $20! It was so easy that I want to do them in every room!


A craft corner was key for Norah and this is where she spends most of her time. The table, bulletin board and supply storage are all from Ikea. 


These book shelves are also from Ikea 


She got these super cute doll magnets for Christmas so I ordered a magnetic board from Amazon so we could keep them from disappearing under the refrigerator.


The artwork is from an old Rifle Paper Co. calendar that I couldn't bear to part with because the illustrations were so cute. I matted them with some construction paper and voila!

The Linus art was gifted to me by my sister years ago.


This globe was mine when I was little so it got a quick little face lift with some paint and it's good as new! Norah asks me daily to point out her "namerhood" on the world.


I gave up my craft room for the new nursery so I made sure to organize the closet to hold all of my supplies and my desk fit perfectly in the corner of the room.

Of course I had to display my Blythe dolls and I think they make the perfect addition :) 


Monday, May 27, 2013

Memorial Day Makeover: Front Walkway

We had such a productive weekend! We bought and installed new kitchen appliances then tackled our ugly front walkway!

Once again I forgot to take a "Before" picture but Tim snapped a few photos mid day.

Before it was full of weeds and what I like to call "Old People Rocks"...you know, the ones that every 55+ community home has in the front yard?
(No offense Grandma and Grandpa...They were called old people rocks before you moved into your community)


Collecting those bad boys was the hardest part and we were both a little sore the next day.
Anyone need some rocks?


For awhile I've envisioned the landscaping to say, "Palm Springs" and my love for succulents fit right in with that theme. Picking out all these little guys was so much fun!


We got home with about an hour of daylight to spare and got everything planted and put in it's place.

This morning I got to wake up to this and it was sooooo worth it!


I can't wait for them to grow and fill in! I'm hoping it will look like a lovely, succulent river flowing through our front yard :) 


Thursday, May 16, 2013

Rustoleum Kitchen Transformations Review


Let me start off by saying that although my experience wasn't the greatest, I know people who have used the product and their results were much nicer.

Also, after speaking with a representative at Rustoleum, we were refunded and given instructions on how to fix the issue.

____________________________

I can't think of an easier way to do cabinets. This kit requires absolutely no sanding which is worth it on it's own. Pretty much everything you need is included in the box. All you do is choose the color and have it tinted in the paint department.

There are tons of colors to choose from too!


The steps are as follows:

1. Number your doors with painters tape before you remove them and all hardware. This will help in the end when it all looks like one big puzzle.

2. Clean cabinets and use the degreaser provided with a scrub pad and scrub the heck out of them. This will leave a sudsy residue that you need to wash off and dry using a lint free rag. USE GLOVES! This stuff will destroy your hands. I had skin peeling off the spots that were touched.

3.  Start with the frames and apply the first coat of your base color. The kit claims it only needs two coats (letting each coat dry 2-3 hours before the next) I was on coat four and still thought it could use more but I wanted to keep the look of the grain.


4. Next is the doors. I suggest that you get a saw horse and set them up like an assembly line. We ended up setting up our doors on the garage floor on top of soup cans and we had sore knees from kneeling on the cement. Start with the front of the door because it will drip down towards the back and cause buildup if you don't catch it. It's better to have that on a part that's not always visable.

5. After the bond coats (which is your base color) are completed and dry, you have the option to apply the decorative glaze. I skipped this process because I wanted a clean, white look. My Grandpa did their cabinets in a darker color and used the glaze and said it was the hardest part. You use cheesecloth to apply and drag it down the cabinet and it can be difficult to keep a consistent look.

6. Next it's time for the clear coat. This is where things went down hill. The clear coat is a milky white color and a bit temperamental to work with. Once you brush it on theres no going over it. Think glue. I found that long, consistent strokes worked best and using a light to shine on the cabinet prevents you from going back over parts that already have a coat.  As it dried it started turning yellow in spots, especially in corners or nooks where it collected. On the darker cabinets it drys a milky white instead of yellow. This is a crucial part and you have to work quickly and carefully making sure not to leave any behind. When I woke up the next morning the cabinets had a yellow hue reminiscent of a smokers home.

**I called the company in a panic and before I could even finish, the representative knew what I was talking about. He apologized and told me that using the White kit on Light Oak wood does this and they just started marking the boxes to explain that you would need to use a strong primer before starting the process. Cue sadness! All of my hard work and I had to start all over and add an extra step!!!**

They suggest Zinser Primer which is the thickest, stickiest paint I've ever used. After that dried I started the process all over and it ended up white...whew!

Like I said, I'm not totally anti-Rustoleum but I wish that they would've been more proactive in informing customers that this would happen if you choose white. What's done is done and they were quick to refund us and help out. I think the dark colors turn out great and are probably more forgiving.


Tuesday, May 14, 2013

Kitchen Makeover-Work in Progress!

Last month when Tim went to India for a couple of weeks I was dead set on transforming the kitchen by the time he got home. It was the most daunting task I've ever faced but I was bound and determined to do it, and on my own. The biggest step was to paint the cabinets using the Rustoleum Transformation kit. It seemed easy enough and it didn't require sanding which was a huge bonus. I was working on them till the day he returned and with the final step, a clear coat, I saw my beautiful white cabinets and 2 weeks of work flushed down the toilet with an ugly yellow hue displayed for all to see. I was devastated. Luckily my husband was home to talk me through it and lend a helping hand because after many emails and phone calls to the company I was forced to start from the very beginning and add a step at that! More on the whole process later (I'm not totally anti-this product believe it or not).

Here's some before pictures of our kitchen:


It was sooo dark! Plus, after we got our new dark flooring the light oak cabinets stuck out like a sore thumb! 


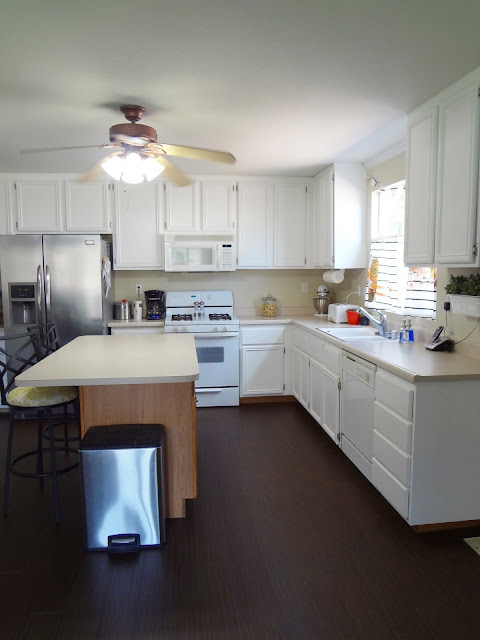
And now for the after:
(Keep in mind it is still a work in progress. Next up are new counters, A new island, and getting the rest of our appliances in stainless steel....come on lottery!)


What a difference the white makes! We are in love! It's so much happier and brighter!

I found the loveliest fabric on sale to cover the stools:


I had the hardest time deciding on which fabric to use for curtains. Little did I know the perfect fabric was upstairs in the form of a stained shower curtain!


A little cutting and sewing and voila! 
Like I said, its a work in progress but I'm really loving the way it's turning out!

Thursday, May 9, 2013

Bathroom Re-do: 2 days, $100.

Ive been on such a home improvement kick lately but I am slacking in the picture posting department.
So let's start with our upstairs guest bathroom.  It was sooooo boring. Just white everything! 

I'm so horrible at remembering to take the before photos so these are after I removed everything and started taping off the walls for paint.


Not much to see...Some white, some off white, and some whitest white.

I knew I wanted something bolder than I've done with the rest of the house and no better place to try it out than an upstairs bathroom. 


Inspiration


Simple and Sophisticated!

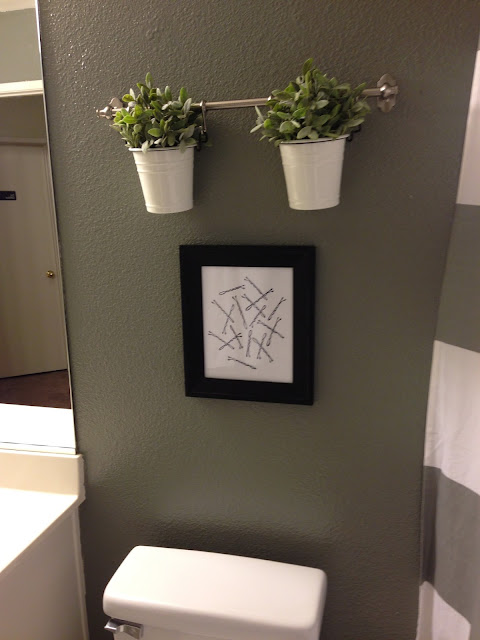
Paint: Valspar in Cast Iron
Shower Curtain: West Elm
Print: DIY by Me but inspired by Rifle Paper Co.
Glass Canisters: Crate and Barrel
Tray: Ikea
Plant Buckets/Hanging Rod: Ikea


Tuesday, March 26, 2013

Craze Tuesday: Modern Backyard


modern backyard


Over the weekend we found these awesome cafe lights on sale at Target! I've wanted them since we first moved in and I can't believe how lovely our patio looks now. 
I have this modern vision for the backyard...think Palm Springs Resort...